
Background
One of the problems of restoring vintage machines goes beyond the actual fixing of the hardware. Once the
machine in question is powered up and running what next? Networking was something reserved for the enterprise, universities and
research establishments while your average home or small business machine would boot from an 8" or 5.25" floppy disk. Over time these
original floppies have degraded purely because they're simple bits of plastic covered in a magnetic oxide that were never really well
cared for later in the late 80s as better and more convenient tech took over.
Age has also affected the drives themselves, a perennial problem with equipment this old is the drying out of electrolytic
capacitors that leak and either stop working or damage the boards they're soldered to. This plagues owners of vintage machines because unlike
a computer which has some form of output device (display, diagnostic LEDs etc) a floppy drive has nothing. If it's not working it won't read
disks, but also is it the media itself that's faulty or the controller in the machine itself? Power supply?
A baseline known working machine is needed that can be configured as a source or destination for the many disk images that are
available out on the web for a multitude of machines from the Altair through the Research Machines 380Z to the Tandy range and beyond.
I've been half-heartedly attempting to write images for various machines over the years without actually learning the mechanisms involved so
when something failed it was 'probably' the drive I was using or 'maybe' a bad disk image.
Isn't it easy?
Some platforms make floppy recreation relatively easy thanks to the vintage collecting community that has come up with
some excellent ways of bringing machines fully back to life using the old serial protocol known as RS232. Older Apples have the luxury of
ADTPro which can baremetal boot an Apple ][, //e, //GS over a serial link from a Mac or PC then
let you transfer floppy disk images over the same serial link to genuine 5.25" disks which you can then boot natively. ADTPro also allows use
of 'virtual disk' images that appear locally as hard drives.
8-bit Atari machines with floppy drives like the Atari 810 have several options available, the simplest being the SIO2PC
which can be made at home for pennies then run in conjunction with a PC-based disk image server like APE.
CP/M machines had a built-in capability to transfer between machines via RS232 but for that to work you needed
a working boot disk so how do you get one of those if your machine came without disks? Thankfully a company called Sydex Inc in the US
produced ANADISK and TELEDISK, a pair of excellent utilities that could analyse unknown floppies and create disk images which could then be
rewritten to new disks. TELEDISK was shareware but in the 90s Sydex sold up and disappeared so vintage machine collector
Dave Dunfield created an open source version called
ImageDisk that these days is the default go-to for disk
image manipulation.
In Practice
However, having the tools to recreate disks is one thing, but hardware is still needed for actual disk writing.
My catalyst for researching the required hardware was restoring my RML 380Z
which despite having double density 5.25" drives only supported 80k single density disks.
Ignoring 8" floppies, disks came in these formats:
- SSSD - Single Sided, Single Density, 80KB capacity, FM encoding
- DSSD - Double Sided, Single Density (A CP/M 'kludge'), 80KB per side, FM encoding
- DSDD - Double Sided, Double Density, 360KB capacity, MFM encoding
- DSQD - Double Sided, Quad Density, 720KB capacity, MFM encoding
- DSHD - Double Sided, High Density, 1.2MB capacity, MFM encoding
Dave Dunfield and the Classic Computer Collectors community have been collating a list of boards that
will do most if not all of the 'old' formats, the most up to date version as at March 2018 is here.
Since I already had an old ISA PC running Win98 I tracked down one of the Adaptec boards listed, the AHA-1524CF, only to discover there's two
variants of this board, one with a National floppy controller and one with an Intel controller. Only the National controller will write
single density disks. Guess which one I got.
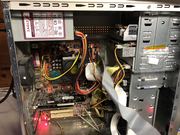
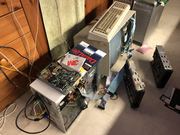
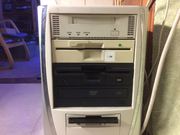
In the end I bought an Abit KV8Pro board because it contains a Winbond W83627HF SuperIO controller
that works well with older disk formats. I installed an Athlon64 processor, 2GB RAM and a Radeon graphics card then loaded Windows 98. Win98
is needed because ImageDisk and other imaging tools need direct access to the hardware to be able to work which is something Windows2000, XP and
above don't allow. With Win98 you can boot to pure DOS 7.0 which makes life easier. This in itself led to
the discovery that Win98 has a maximum RAM limit of around 768MB and will crash on a multi-GB machine. The answer to this was a freeware
version of HIMEM.SYS which will let you force a configurable limit
on upper RAM. I also installed Linux Mint 18 so I have a nice networked dual boot system that I can download images to and put them directly
into the Win98 partition then reboot to DOS 7 and go from there. The shareware versions of ANADISK and TELEDISK
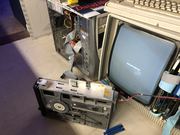
can still be found online and ImageDisk is a must. For 5.25" drives themselves I already had
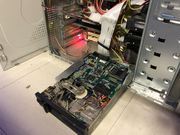
a Mitsubishi M4853 Dual Density and a Mitsubishi MF504C High Density which sprang back into life after I replaced all the leaked capacitors
on the motor control board.
*update* - I now also have a YE-Data YD380 which is working nicely too.
Other things to beware of are:
- BIOS settings. Drive A: will be the 5.25" (360KB or 1.2MB) and B: is the 3.5" (1.44MB). There may be an option to swap them in the BIOS so to DOS the 3.5" drive is always A in case you need to boot from it.
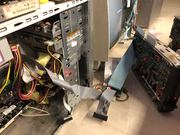
- Cable. You NEED a proper cable capable of supporting two drives which has a 'twist' forcing drive selection. 5.25" drives use a 'card edge' type connection and 3.5" drives use a 34-pin plug.
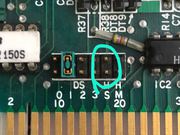
- Jumper settings. Each floppy drive must be correctly jumpered as either DS0 or DS1. Most other jumpers can be left at factory defaults, though an important one is 'head select' which may be marked HS. Also motor control needs to be under drive select. Consult the service manual for your drive if you can find it.
- Termination. The last drive on the cable must be fitted with a terminator block. Typically the 3.5" drive has these always installed so make sure it is last and remove any terminators from the 5.25" drive. Typically these look like blue or white chips.
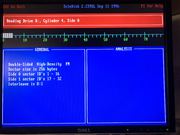
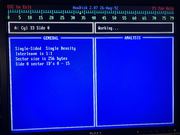
- Testing. ImageDisk comes with a utility called TESTFDC which will analyse the 5.25" drive and display its c apabilities, then test a low density and high density disk (if applicable). The results from this are what appear in the Glitchworks FDC test page linked up above.
8" Drives
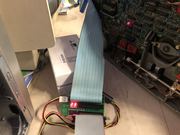
Successful testing with a drive from my CPT 8520 and an FDADAP
shows I can now dump 8" floppies as long as they're not DEC RX02 format. The only thing I needed to do to the Tandon TM848-01
drive was undo its soldered factory settings so I could add jumpers to enable motor control under device select. The CPT does things differently.
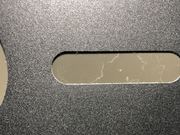
Unfortunately I can't test writing as my 'new' box of disks has suffered
from bitrot or been stored badly before I got them since they appear to have distemper though it could just be the magnetic coating of
the disk breaking down. Shame
Pictures
 |  |  |  |
 |  |  |  |
 |  |  |  |